Estimating Part Costs with CUTL: A Comprehensive Guide
- Boris
- Oct 16
- 3 min read
Updated: Nov 10
Getting Started with CUTL
To begin, you need to create an account. The process is straightforward:


Provide your email address and create a password. Registration is free and only needed so you can use your personalized database of materials and pricing during calculations. After registration and email verification, you can log in to the system. The first step is to fill in your reference data.

Setting Up Your Environment
At a minimum, you need to create:
One machine,
At least one material,
And specify cutting modes.
You can also use our embedded generator to automatically create machines, materials, and cutting modes—just press the Generate button on the Equipment or Equipment Type form.
Since we plan to introduce modules for machine load planning and shift job generation in the future, some basic classification is required. You should add:
Equipment type (e.g., laser, plasma, waterjet, etc.),
The specific machine (for example, “Laser 2 kW”).
Once your equipment is added, you can define cutting modes and cutting cost parameters for it.
Defining Cutting Modes
For each material type and thickness, you need to create a mode that includes price and time (if cutting and piercing time data are available). The cost is specified per linear meter of cut and per piercing. For example, you might create three different cutting modes for various materials or thicknesses.

Adding Materials
When adding a material, you can set its price to 0 if you plan to enter the material cost manually each time or use it for customer-supplied materials. Alternatively, you can pre-fill a price list and use those values automatically.

Once the price list is entered, the setup phase is complete—you’re ready to start calculating part costs.
Quick Calculation
Suppose you have a part with a DXF file.

The simplest way to calculate its cost is to upload the drawing to the Quick Calculation section.

The system will analyze the file and display a result like this:
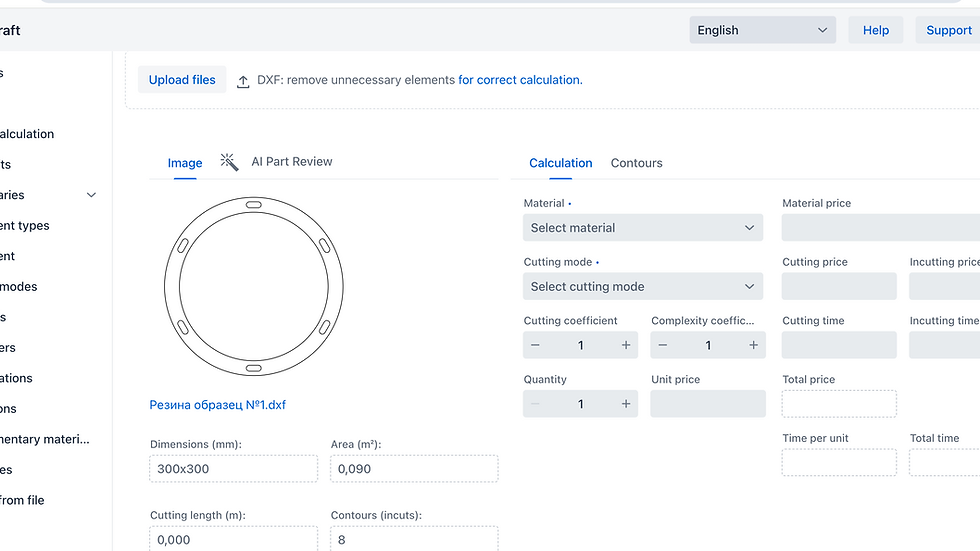
You’ll need to specify:
The material, and
The cutting mode.
The platform will immediately generate a rough cost estimate for your part.
Adjusting for Real-World Conditions
Sometimes, the actual material usage is higher than the part size due to inefficient cutting or irregular shapes. In such cases, you can increase the cutting coefficient, and the result will automatically update. For example, if you increase the area by 30%, the total part cost will rise accordingly.
In other scenarios, cutting may be more complex due to factors not reflected in the drawing (e.g., uneven material or difficult customer requirements). You can account for this by increasing the complexity coefficient, which effectively raises the cutting length and cost. Both coefficients can be applied simultaneously.

Contour Analysis and Manual Adjustments
On the Contour Table tab, you can view detailed analysis results—each contour’s length, whether it’s closed, and more. The contour selected in the table is highlighted in green on the preview.

You can also manually adjust the material price: If the price is increased relative to the base rate, a green icon appears next to it; if decreased, a red one.

Final Notes
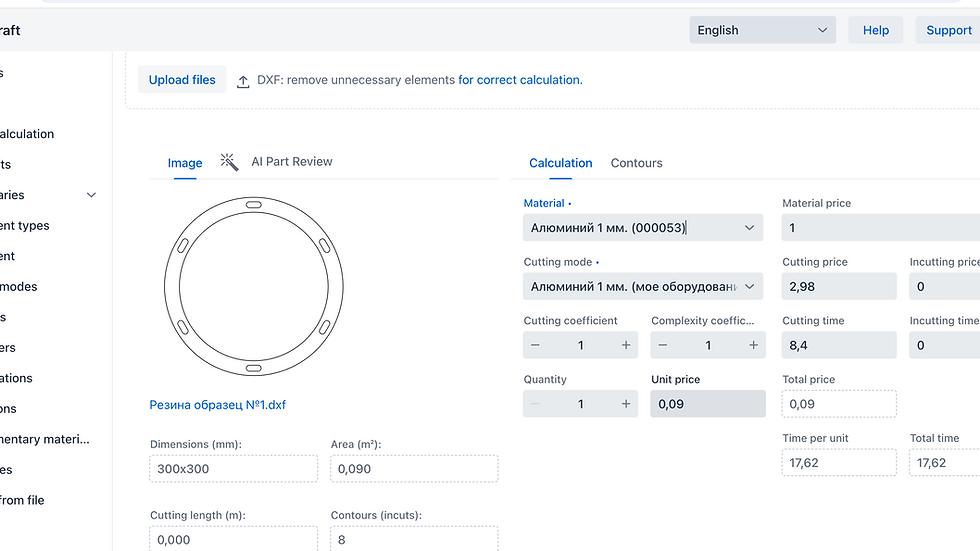
If your material and cutting mode databases are prefilled, you can get a part cost estimate in just a few seconds.

Moreover, if each material has a default cutting mode assigned, then after uploading a drawing you only need to select the material—CUTL will automatically apply the mode. This means you can get a cost estimate in just two clicks:
Upload the drawing.
Select the material.
That’s it! This approach allows you to quickly and easily calculate cutting costs for laser, waterjet, plasma, or EDM cutting. While each machine type has its specifics, once you express them in cost per meter and pierce count, the calculation becomes straightforward.
Conclusion
In conclusion, using the CUTL platform simplifies the process of estimating part costs. By following the steps outlined above, you can efficiently set up your environment, define cutting modes, and quickly calculate costs. This not only saves time but also enhances accuracy in your estimations. Whether you are working with various materials or different cutting methods, CUTL provides the tools you need to succeed in your projects.
For more information on how to optimize your cutting processes, feel free to explore our resources and guides.


Comments